Archive

Category Archives for "Resources"

DROP Spreader VS BROADCAST Spreader

[et_pb_section fb_built=”1″ _builder_version=”4.2.2″ custom_padding=”0px||2px|||” global_colors_info=”{}”][et_pb_row _builder_version=”4.2.2″ global_colors_info=”{}”][et_pb_column type=”4_4″ _builder_version=”4.2.2″ global_colors_info=”{}”][et_pb_text _builder_version=”4.2.2″ custom_margin=”||-20px|||” global_colors_info=”{}”]

Spreaders are tools intended to be used in gardens and lawns, enabling people to distribute fertilizers and seeds equally. Spreaders are handy because they allow you to apply seeds and fertilizer evenly to your lawn or farmland. Whether you are seeding new areas or improving existing lawns, the appropriate spreader helps to make the most of your efforts and investment.

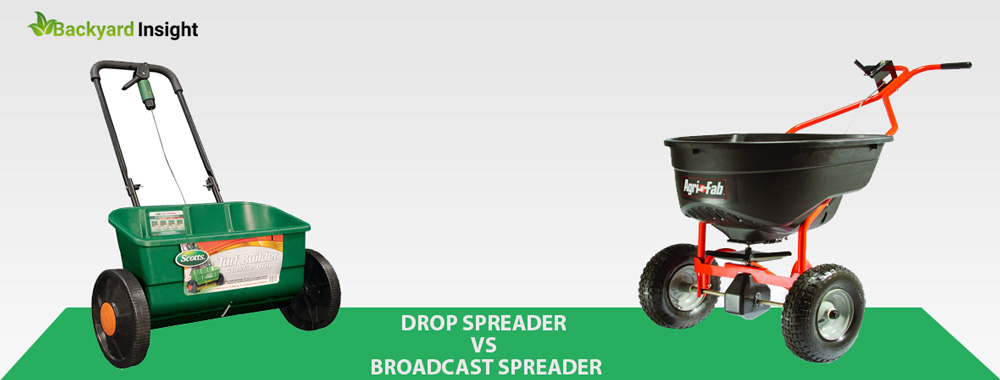
The impact of using the right spreader is just so notable. There are two kinds of spreaders; drop spreader and broadcast spreader.


[/et_pb_text][/et_pb_column][/et_pb_row][et_pb_row column_structure=”1_2,1_2″ _builder_version=”4.2.2″ custom_padding=”3px|||||” global_colors_info=”{}”][et_pb_column type=”1_2″ _builder_version=”4.2.2″ global_colors_info=”{}”][et_pb_text _builder_version=”4.2.2″ global_colors_info=”{}”]

A typical drop spreader will like:-

[/et_pb_text][et_pb_image src=”https://backyardinsight.com/wp-content/uploads/2021/06/Scotts-Turf-Builder-Classic-Drop-Spreader.jpg” alt=”drop-spreader-vs-broadcast-spreader” title_text=”Scotts-Turf-Builder-Classic-Drop-Spreader” _builder_version=”4.9.4″ global_colors_info=”{}” width=”98.5%” custom_margin=”|-761px||||”][/et_pb_image][et_pb_text _builder_version=”4.10.7″ _module_preset=”default” hover_enabled=”0″ global_colors_info=”{}” sticky_enabled=”0″]

Scotts 76565 Turf Builder

Classic Drop Spreader,

[/et_pb_text][et_pb_button button_url=”https://www.amazon.com/Scotts-Turf-Builder-Classic-Spreader/dp/B002ZTK09U?dchild=1&keywords=scotts+turf+builder+classic+drop+spreader&qid=1622907480&s=lawn-garden&sr=1-4&linkCode=ll1&tag=backyardinsights-20&linkId=fd7208527e6143e65253f38c244b28b5&language=en_US&ref_=as_li_ss_tl” button_text=”View On Amazon” button_alignment=”center” _builder_version=”4.10.7″ _module_preset=”default” custom_button=”on” button_text_color=”#FFFFFF” button_bg_color=”#E02B20″ button_rel=”off|off|on|off|off” hover_enabled=”0″ global_colors_info=”{}” custom_margin=”||19px|||” sticky_enabled=”0″ button_text_size=”15px” button_border_color=”RGBA(0,0,0,0)” button_border_radius=”17px”][/et_pb_button][/et_pb_column][et_pb_column type=”1_2″ _builder_version=”4.2.2″ global_colors_info=”{}”][et_pb_text _builder_version=”4.2.2″ global_colors_info=”{}”]

A typical broadcast spreader looks like

[/et_pb_text][et_pb_image src=”https://backyardinsight.com/wp-content/uploads/2021/06/Agri-Fab-45-0462-Push-Broadcast-Spreader.jpg” alt=”drop-spreader-vs-broadcast-spreader” title_text=”Agri-Fab-45-0462-Push-Broadcast-Spreader” _builder_version=”4.9.4″ global_colors_info=”{}” custom_padding=”|||6px||”][/et_pb_image][et_pb_text _builder_version=”4.10.7″ _module_preset=”default” hover_enabled=”0″ global_colors_info=”{}” sticky_enabled=”0″]

Agri Fab-45-0462

Push Broadcast Spreader

[/et_pb_text][et_pb_button button_url=”https://www.amazon.com/Agri-Fab-45-0462-Push-Broadcast-Spreader/dp/B002U0KDH8?dchild=1&keywords=Agri-Fab-45-0462-Push-Broadcast-Spreader&qid=1622908357&s=home-garden&sr=1-2&linkCode=ll1&tag=backyardinsights-20&linkId=3b20bcc89d6a9e66b0b65c320c7eeb36&language=en_US&ref_=as_li_ss_tl” url_new_window=”on” button_text=”View On Amazon” button_alignment=”center” _builder_version=”4.10.7″ _module_preset=”default” custom_button=”on” button_text_color=”#FFFFFF” button_bg_color=”#E02B20″ button_rel=”off|off|on|off|off” hover_enabled=”0″ global_colors_info=”{}” button_text_size=”15px” button_border_color=”RGBA(0,0,0,0)” button_border_radius=”14px” sticky_enabled=”0″][/et_pb_button][/et_pb_column][/et_pb_row][/et_pb_section][et_pb_section fb_built=”1″ _builder_version=”4.2.2″ custom_padding=”4px|||||” global_colors_info=”{}”][et_pb_row _builder_version=”4.2.2″ custom_padding=”||0px|||” global_colors_info=”{}”][et_pb_column type=”4_4″ _builder_version=”4.2.2″ global_colors_info=”{}”][et_pb_text _builder_version=”4.10.7″ custom_margin=”13px|||||” hover_enabled=”0″ global_colors_info=”{}” header_2_font_size_last_edited=”on|tablet” header_2_font_size_tablet=”28px” header_2_line_height=”1.2em” sticky_enabled=”0″]

What is Drop Spreader?

On a general note, a typical drop spreader is a low cost, durable and drops the materials in just about the right proportions in exactly the right place. A hand-grip switch will allow the operator to select the dimensions of the holes, which will control the amount of matter dropped out.


What is Broadcast Spreader ?

On the other hand, Broadcast spreaders disperse or “broadcast” seed in a fan-like way over a wide area, with the aid of a rotating piece under the hopper holes. The size of the fan depends on the size of the hole and your speed. They’re suited for wide areas and big lawns.

What’s the difference between a Drop Spreader and a Broadcast Spreader?

The difference between the drop spreader and the broadcast spreader lies in the area or scope of coverage, the time it will take, the wind condition, and the shape of lawn amongst others. The drop spreader is more meticulous as such it covers less area less than 5000sqft, would not mind the wind condition as it will drop where it is set to drop, will require more time to handle a large span of the lawn. Contrary the broadcast spreader can well cover a large span of space but will have an issue with a windy location as it will scatter to areas where it is not intended will take quite lesser time to do your spreading. Again, the drop spreader works well on a regular polygon-shaped lawn, but no, the broadcast spreader can work on just any shape and even hard areas.


[/et_pb_text][/et_pb_column][/et_pb_row][et_pb_row _builder_version=”4.2.2″ custom_padding=”||11px|||” global_colors_info=”{}”][et_pb_column type=”4_4″ _builder_version=”4.2.2″ global_colors_info=”{}”][et_pb_toggle title=”1. What settings do I put my spreader on for grass seed?” _builder_version=”4.2.2″ global_colors_info=”{}”]

How do you use Scotts Turf Builder classic drop spreader? The spreader is simply for lawn space less than 5000sqft.

[/et_pb_toggle][et_pb_toggle title=”2. How do you use Scotts Turf Builder classic drop spreader?” _builder_version=”4.2.2″ global_colors_info=”{}”]

To obtain the best results, the hole size of your spreader has to be adjusted so that seed is passed at the correct rate.

[/et_pb_toggle][et_pb_toggle title=”3. Can I use a broadcast spreader for compost?” _builder_version=”4.2.2″ global_colors_info=”{}”]

Yes, but it is best with a drop spreader

[/et_pb_toggle][et_pb_toggle title=”4. What is a broadcast spreader used for?” _builder_version=”4.2.2″ global_colors_info=”{}”]

The broadcast spreader is used for spreading seeds or fertilizers across wide areas, for jobs that don’t much require precision. You can spread over a larger area in limited time with the broadcast spreader.

[/et_pb_toggle][/et_pb_column][/et_pb_row][et_pb_row _builder_version=”4.2.2″ custom_padding=”6px|||||” global_colors_info=”{}”][et_pb_column type=”4_4″ _builder_version=”4.2.2″ global_colors_info=”{}”][et_pb_text _builder_version=”4.2.2″ custom_padding=”0px|||||” global_colors_info=”{}”]

Conclusion :-

If you’re considering getting a spreader for commercial purpose, then the broadcast spreader is your thing. And if it’s just for your immediate small lawn at your backyard, please get for yourself a drop spreader as it will help you in more ways than one.

You’ll have peace of mind s you’ll not have to clean areas that you never planned to spread to. Understanding your purpose for the spreader is key in making your chic of a spreader, whether for spreading seed, or compost, or anything similar.

[/et_pb_text][/et_pb_column][/et_pb_row][/et_pb_section][et_pb_section fb_built=”1″ _builder_version=”4.9.4″ _module_preset=”default” global_colors_info=”{}”][et_pb_row _builder_version=”4.9.4″ _module_preset=”default” global_colors_info=”{}”][et_pb_column type=”4_4″ _builder_version=”4.9.4″ _module_preset=”default” global_colors_info=”{}”][et_pb_text _builder_version=”4.9.4″ _module_preset=”default” global_colors_info=”{}”]
[/et_pb_text][/et_pb_column][/et_pb_row][/et_pb_section]

How to dispose of dyed mulch

Mulching is an essential gardening practice that involves using organic materials like leaves, sawdust, hay, and stray to cover soil. Whether your garden has vegetables, trees, or shrubs, they can benefit a lot from mulches. 


Mulches have many benefits including soil protection, suppressing weed growth, shading the soil, preventing water loss, and adding essential nutrients to the soil for proper growth of plants.


In most cases, this practice is usually done annually or semi-annually in the fall and spring. According to gardening experts, having the right mulch in your garden can help improve plant health over time. 


On the other hand, the wrong mulch can damage your plant health. This is why many people are finding the best possible ways on how to dispose of dyed mulch. It's not advisable to use any mulch that you come across since some can have adverse effects on the soil. 


In most cases, experts discourage using dyed mulches in the garden. Such mulches come from salvaged and recycled materials like lumber products and scraps which contain numerous contaminants such as lead, copper, formaldehyde, arsenic, etc.


Why should you avoid using dyed mulch?

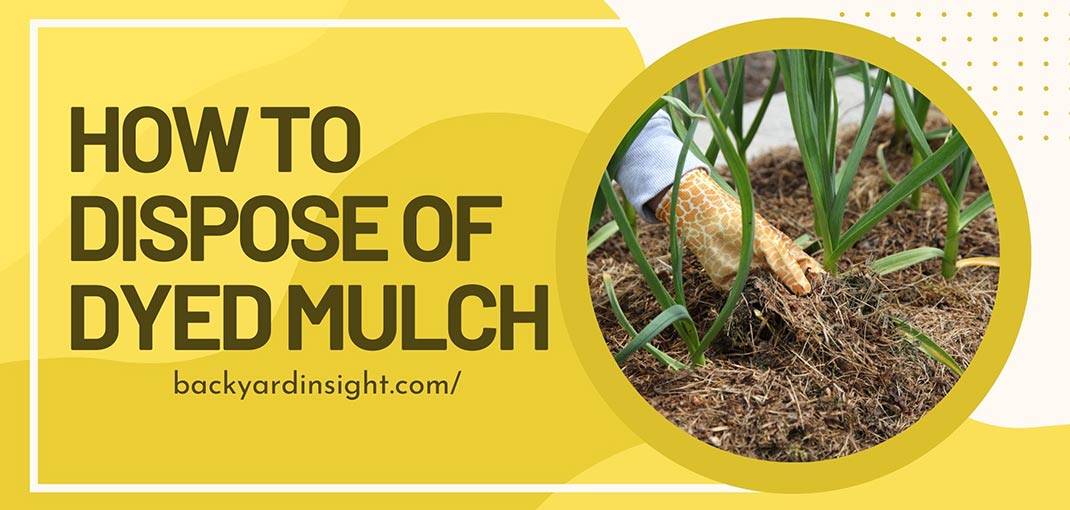
how-to-dispose-of-dyed-mulch


Dyed mulches can have several adverse effects on your garden as explained below:


A. Can lead to soil contamination

Since dyed mulch contains toxic substances including heavy metals, it can lead to soil contamination. When the toxic contaminants leach into the garden soil, they react with the soil and interfere with the natural plant growth over time.

B. Destroying the soil ecosystem

Dyed mulches harm the soil ecosystem. Garden soil contains insects, bacteria, worms, and fungi which play a significant role in improving soil structure, water absorption, aeration, and adding nutrients. The contaminants in dyed mulches can easily destroy soil life thus affecting the essential activities that impact plant growth.

C. Can result in water contamination

Using dyed mulch can contaminate water thus making it unsafe for use. These toxic contaminants can also easily be washed into water bodies during runoff thus affecting the entire aquatic environment.

D. Dyed mulch doesn't break down easily

Mulches break down over time to give extra nutrients to the soil. With dyed mulches, this isn't the case.

What to do with dyed mulch

If you don't know how to dispose of dyed mulch, you should consider checking municipal guidelines to make sure you do the right thing. Composting or adding dyed mulch in waste bins isn't recommended.

It's advisable to bag up the mulches and take them to waste management facilities for proper disposal. Most dyed mulches contain toxic substances that vary depending on the dye used and the source.

Most cheaper brands tend to have very toxic chemicals. Some dyed mulches are sourced from recycled wood which may contain chromate copper arsenate.

This substance is very harmful to people, animals, and plants. Again, if you don't know how to dispose of dyed mulch, you can consider applying new mulches on top of old mulches provided that the new mulches come from natural sources.

This will make it easier for the old mulches to break down over time

How to dispose of dyed mulch

Disposing of dyed mulch is very simple. Before you start, you need equipment such as gardening gloves, a tarp, a shovel, leaf blower, rake, and an edger tool. Below is a step-by-step guide on how to get rid of old mulch:

  1. Get rid of the mulch using your hands. You shouldn't do it with bare hands since the mulch may contain germs, fungus, pathogens, and bacteria.

    Wearing gloves is necessary. You should remove a portion of the mulch some days within a week. This shouldn't be consistent to avoid bright sunlight from causing damage to your plants.

  2. The next step is to remove mulches that are stuck in various locations in your garden. Before you remove them, you should loosen them using an edging tool. In this step, you don't want to leave some traces of dyed mulch in the garden.

    Therefore, you must ensure that every part of your garden perimeter has been reached.

  3. After loosening the mulches and removing them from every part of your garden, you should then break down all mulch clumps and clusters using a rake.

    During the process, you must be extra careful to avoid damaging plants around. Gardening experts recommend leaving some inches away from the plant's stem.

  4.  You should then scoop out mulch moulds using a shovel. You should also have a container or tarp in place where you'll put the mulch mould.

  5. This step involves brushing mulches that remain on plants' bases. In most cases, it's difficult to use a rake to get rid of the entire mulches on plant bases due to the risk of destroying the garden plants.

    Therefore, you need to wear gloves and manually remove any mulches left closer to the plants and put them into a container.

  6. Even after removing the remaining mulches around plant bases, you might still see some small traces of mulches around the plants.

    Here, a leaf blower is essential to eliminate such traces. This equipment shouldn't be used for too long since it can blow the soil around the plant away, and make it too hot or dry.

  7. The final step is to dispose of the dyed mulch. You can dispose of the mulches in yard waste bins.

In conclusion, these are steps on how to dispose of old mulch. Experts don't recommend burning old mulches since they can cause huge fires and other disasters. Before disposing of these mulches, it's essential to separate them from natural mulches.

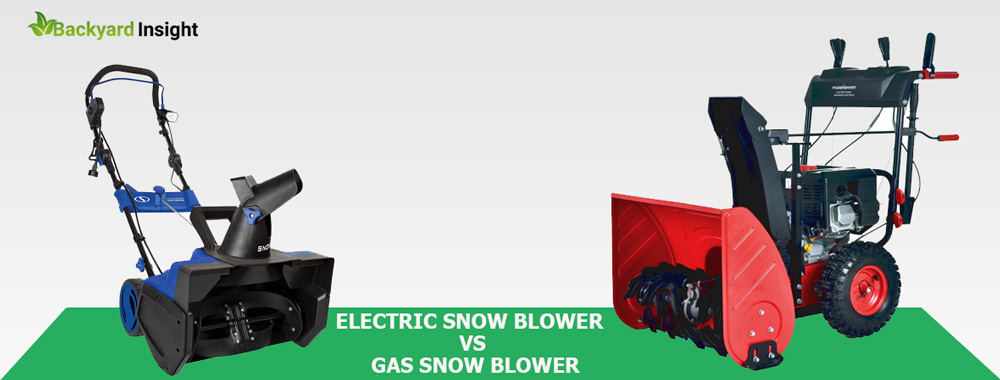
Electric Snow Blower VS Gas Snow Blower

[et_pb_section fb_built=”1″ admin_label=”section” _builder_version=”3.22″ global_colors_info=”{}”][et_pb_row admin_label=”row” _builder_version=”3.25″ background_size=”initial” background_position=”top_left” background_repeat=”repeat” global_colors_info=”{}”][et_pb_column type=”4_4″ _builder_version=”3.25″ custom_padding=”|||” global_colors_info=”{}” custom_padding__hover=”|||”][et_pb_code _builder_version=”4.10.7″ _module_preset=”default” hover_enabled=”0″ sticky_enabled=”0″][/et_pb_code][et_pb_text admin_label=”Text” _builder_version=”4.10.7″ background_size=”initial” background_position=”top_left” background_repeat=”repeat” hover_enabled=”0″ global_colors_info=”{}” sticky_enabled=”0″ header_2_font_size_last_edited=”on|tablet” header_2_font_size_tablet=”28px” header_3_font_size=”24px” header_3_font_size_last_edited=”on|phone”]

Have you ever lived in an area that has enough snow every year that you have to constantly shovel it off your driveway and walkways? Then, you already know what a time-consuming task it must have been using a shovel.

Right now, it may be that you’re considering getting a snowblower or snow thrower as they are properly called for the fact that they don’t blow snow.

[wptb id=791]

Just a bit of history.

The first snowblower was developed in 1925 in rural Canada to clear snow-covered roads by a farmer and road contractor Arthur Sicard. Having been built by a farmer, it was not surprising to have it look like a hybrid of wheat, with two rotating blades on the front and a long chute that hurled the snow to one side. Further developments and variations on this first system became needful for all road builders, airports, and railroads around the world.

In 1951, Toro launched the domestic push snowblower cementing the machine’s role as one of the most important back-saving devices ever made.

Generally, you have the options of an electric snow-blower and the gas snowblower. Both have got their best uses though.


ELECTRIC SNOW BLOWER

Electric snow blowers tend to have a cutting range of about 18 inches and a power rating of between 12 and 15 amps. They are good for clearing snow areas within the size of a 3 car driveway and sidewalks. They could be classified as capable to clear up to 10 inches of snow at a time, but snow depths of 4 to 6 inches are more practical. They could clear snow from the electrical outlet up to around 150 feet maximum.


GAS SNOW BLOWER

Gas-powered snow blowers on the other hand, like the name, implies use gas instead of electric. It does not need a chord.

The gas snow blowers are usually of two kinds; the single-stage and the two stages blowers following their capacity.

Single-stage snow blowers are usually 21 to 24-inches and are rated to clear about 12-inch snow at a time. You can be sure to remove 6 to 8 inches in one pass.

Instead of the 2-cycle engines which require you to add oil to the gas, they are now powered by 4-cylinder engines, which are quieter and can handle more load, and more equipped for tougher terrains.

The 2 stage gas snow blower, on the other hand, are sized to a cutting width of 24 to 33 inches and are self-propelled with up to 6 forward speeds and backwards.

The unique thing about the 2 stage snow blower is that it can handle wet snow better, as they are powered by a secondary impeller from the chute and are also able to clear up to 24-inch deep snow.

On a commercial scale, you should be considering the 2 stage gas snow blower, especially if you live in the mountains. In some cases, the single-stage can come in electric or the gas model, just the way you can get the 2 stage gas model coming with an electric starter in many cases.


Before you choose a snowblower

Before you decide to pick which kind of snow blower you should go for, you need to answer a very vital question; what do you need? Your answer to this question has a way of helping you go for the very appropriate snow blower well suited for your need.

The PROs and CONs

The different snowblowers have got their uniqueness, and they’ve also got their pros and cons, you need the understanding of those to aid your decision.


In Conclusion:-


Your choice of whether an electric snow blower or a gas snow blower will be largely dependent on the area you need the blower to clear. So if you have a larger space or area you’ll need a higher capacity snow blower, then a gas snow blower it is, not minding that it will need gas and has other constraints.

And if it’s just a small area, a portable electric snow blower would do because it will not take much energy but has a limitation in terms of speed, and the chords may be a concern at some point.

A snow blower is a great tool, but the choice of which to take lie with you. As you know your need better (what use you want the tool for), you are set to pick what’s best for you

[/et_pb_text][et_pb_code _builder_version=”4.10.7″ _module_preset=”default” hover_enabled=”0″ sticky_enabled=”0″ raw_content_last_edited=”on|phone”][/et_pb_code][/et_pb_column][/et_pb_row][/et_pb_section]

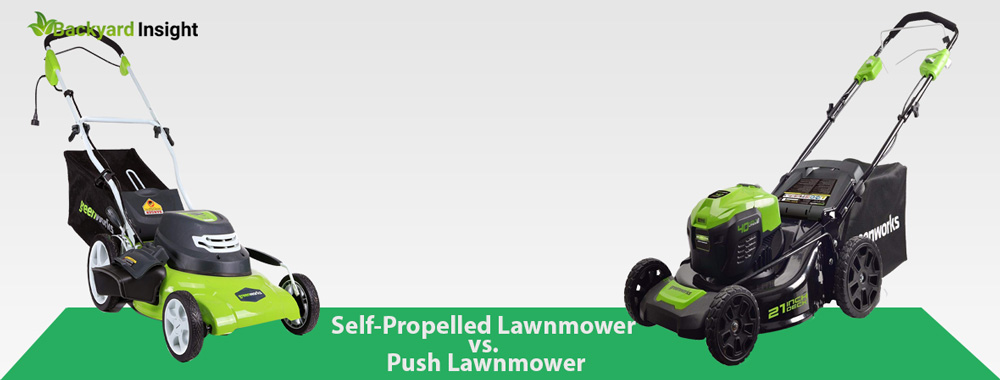
Self-Propelled Lawnmower vs. Push Lawnmower

[et_pb_section fb_built=”1″ _builder_version=”4.2.2″ global_colors_info=”{}”][et_pb_row _builder_version=”4.2.2″ global_colors_info=”{}”][et_pb_column type=”4_4″ _builder_version=”4.2.2″ hover_enabled=”0″ global_colors_info=”{}” sticky_enabled=”0″][et_pb_text _builder_version=”4.10.7″ _module_preset=”default” global_colors_info=”{}”]

If you are the lucky owner of a lawn, then you are most certainly aware of the importance of keeping it neat! In order to do that, efficient tools are necessary. Such a tool happens to be lawnmowers, which are of two types – self-propelled and push lawnmowers.

While these are both great at what they do, they each have their own advantages and disadvantages. And you’ll about them in this self-propelled lawnmower vs. push lawnmower guide.

Now, self-propelled lawnmowers push themselves using gears, requiring no manpower. Push mowers, however, require the user’s energy to do the work of pushing.

Two great examples of these tools are the Greenworks 21-Inch 40V Self-Propelled Cordless Lawnmower and the Greenworks 20-Inch Corded Electric Lawnmower 25022. Let’s compare both of them.

[wptb id=760]
[/et_pb_text][et_pb_text _builder_version=”4.10.7″ hover_enabled=”0″ global_colors_info=”{}” sticky_enabled=”0″ header_2_font_size_last_edited=”on|desktop” header_2_font_size=”28px” header_2_line_height=”1.3em”]

GreenWorks 21-Inch 40V Self-Propelled Cordless Lawnmower vs. GreenWorks 20-Inch 12 Amp Corded Electric Lawnmower

The Greenworks 21-Inch Lawnmower can mow your lawn without running into any issues in thicker areas of weeds or grass, hence preventing any bumps during usage. This great capacity makes this unit an amazing tool for lawn work.

As for the Greenworks 20-Inch Lawnmower, this product also has great mowing capabilities. Being able to perform heavy duty work, this unit will not leave you dissatisfied with weeds or tall grass. As for thick grass, however, caution should be taken. Both the products are great for usage in large lawns.

  • Power

The first product is battery powered and contains a G-MAX 40V lithium-ion battery, which provides high performance, with about 20 minutes of run time on a full charge. The charger provides high performance as well.

It also contains an option for dual battery storage, so two batteries can be used at once. As for the second product, it does not run on batteries and hence does not require any charging! It is manual, depending on the user’s strength and energy to push while using cords to operate with electricity.

This also means that you can use it as long as you want, without needing to pause for charging.

  • Operation

The Greenworks 21-inch uses a self-propelled drive system to work. It contains a single blade for mowing, which contains two cutting edges at opposite ends, making it very efficient.

On the other hand, the Greenworks 20-inch uses a 12 Amp electric motor to operate. Its 3-in-1 functions of side discharge, rear bag, and mulching make it very convenient to use. The drive system for this unit is totally manual, and it contains a push-button for starting.

  • Ease of Use

Being cordless makes the 21-inch very convenient to use as there are no cables that get tangled. This feature does require some time to get used to, however. The 20-inch has a very easy height adjustment system with different options, ranging from 1 ½ to 3 ¾ inches, covering all grass types.

It also contains foldable handles so that it takes less space while in storage. The former unit features the foldable handles as well. Additionally, this mower produces very little noise while cutting, so it will not cause any sound pollution. As it contains cables, there is a chance of them getting tangled while using this product.

  • Price

The self-propelled unit comes at around $450, whereas the push mower is priced around $200. And the difference in operating systems leads to this huge price gap between the two products, as it is much easier to use a self-propelled mower than a push mower.

  • Durability

The Greenworks 21-inch contains a very durable 21-inch steel deck. Similarly, the Greenworks 20-inch contains a durable 20-inch steel deck! As is obvious, neither product outdoes the other on this front, and both are quite long-lasting.


[/et_pb_text][/et_pb_column][/et_pb_row][et_pb_row _builder_version=”4.2.2″ global_colors_info=”{}”][et_pb_column type=”4_4″ _builder_version=”4.2.2″ global_colors_info=”{}”][et_pb_text _builder_version=”4.10.7″ global_colors_info=”{}”]

Frequently Asked Questions

Here we have some of the most commonly asked queries regarding the products:

  1. I am a 60-year-old woman with a disability. Which product should I get?

It is better to get the Greenworks 21-Inch Lawnmower as it does not require any manpower to use.

  1. I have various types of grass growing in my lawn. Which mower will be better?

The Greenworks 20-Inch Lawnmower will be better as it contains 7 different adjustment options for different lengths of grass.

  1. Where can I find the user manual?

The user manuals are available on the website.

  1. Do the handles fold down?

Yes, they fold down for both models.

  1. Does it come with a charger, or does it have to be bought separately?

The first product comes with a charger. And the second one is manual, so it does not require any chargers.

  1. Which product had a longer run time?

The second one, as it is corded and does not require a battery.

  1. Does it come with a cord?

No, the cord has to be bought separately for the push lawnmower. The self-propelled one is cordless.

  1. Is it hard to assemble?

No. Both the products are very easy to assemble by following the user manuals.


Final Words – Which One to Get?

If you have read through the whole self-propelled lawnmower vs. push lawnmower guide so far, then you probably already have an idea as to which product to get!

To summarize, if you do not want to spare any manual work to push your lawnmower and are not on a tight budget, then get the self-propelled product.

But if you have no problem with putting in some manual labor to your mowing, and would like to buy a more budget-friendly unit, then the push mower is the one for you!

[/et_pb_text][/et_pb_column][/et_pb_row][/et_pb_section]

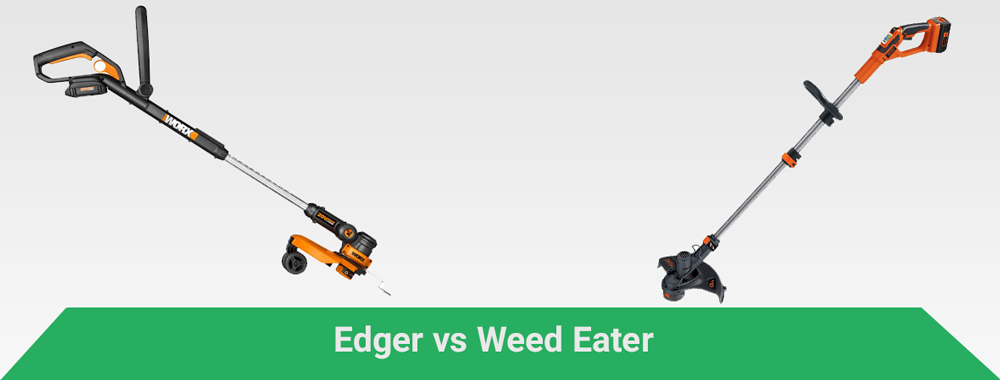
Edger vs. Weed Eater – Detailed Comparison -What the Difference?

[et_pb_section fb_built=”1″ _builder_version=”4.0.9″ global_colors_info=”{}”][et_pb_row _builder_version=”4.10.7″ _module_preset=”default” global_colors_info=”{}”][et_pb_column type=”4_4″ _builder_version=”4.10.7″ _module_preset=”default” global_colors_info=”{}”][et_pb_code _builder_version=”4.14.4″ _module_preset=”default” hover_enabled=”0″ global_colors_info=”{}” sticky_enabled=”0″][/et_pb_code][/et_pb_column][/et_pb_row][et_pb_row _builder_version=”4.0.9″ global_colors_info=”{}”][et_pb_column type=”4_4″ _builder_version=”4.0.9″ global_colors_info=”{}”][et_pb_text _builder_version=”4.0.9″ global_colors_info=”{}”]

The very first thing people notice about your residence is the outlook of it. If your lawn is out of order, then people will surely get much less impressed, even if the inside of your house is pristine.

This is why it is quite important to keep your lawn nice and trimmed, and the first step for doing that would be to know what tools to use.

Despite having a general idea about lawnmowers, the difference between lawn edgers and weed eaters is unclear to many. And our edger vs. weed eater guide is here to clear your confusion.

Now, WORX WG160 GT 2.0 and BLACK+DECKER are two great representatives of edgers and weed eaters.

So, let us take a look at the differences between these two tools in order to get one step closer to the lawn of your dreams!

[/et_pb_text][/et_pb_column][/et_pb_row][et_pb_row column_structure=”1_2,1_2″ _builder_version=”4.0.9″ global_colors_info=”{}”][et_pb_column type=”1_2″ _builder_version=”4.0.9″ global_colors_info=”{}”][et_pb_image src=”https://backyardinsight.com/wp-content/uploads/2020/01/WORX-WG160-GT-2.0-20V-PowerShare-Cordless-String-Trimmer.png” align=”center” _builder_version=”4.0.9″ width=”82%” max_width=”100%” global_colors_info=”{}”][/et_pb_image][et_pb_button button_text=”Check Latest Price” button_alignment=”center” _builder_version=”4.0.9″ custom_button=”on” button_text_size=”18px” button_text_color=”#ffffff” button_bg_color=”#e74c3c” global_colors_info=”{}”][/et_pb_button][/et_pb_column][et_pb_column type=”1_2″ _builder_version=”4.0.9″ global_colors_info=”{}”][et_pb_image src=”https://backyardinsight.com/wp-content/uploads/2020/01/BLACKDECKER-40V-MAX-String-Trimmer.png” align=”center” _builder_version=”4.0.9″ width=”82%” global_colors_info=”{}”][/et_pb_image][et_pb_button button_text=”Check Latest Price” button_alignment=”center” _builder_version=”4.0.9″ custom_button=”on” button_text_size=”18px” button_text_color=”#ffffff” button_bg_color=”#e74c3c” global_colors_info=”{}”][/et_pb_button][/et_pb_column][/et_pb_row][et_pb_row _builder_version=”4.0.9″ global_colors_info=”{}”][et_pb_column type=”4_4″ _builder_version=”4.0.9″ global_colors_info=”{}”][et_pb_text _builder_version=”4.0.9″ global_colors_info=”{}”]


Edger vs. Weed Eater – Key Differences

So what is an edger, and what is a weed eater? A lawn edger, as the name suggests, is a tool for creating clean edges. The edges usually separate the grass from the path to the house, driveway, or pavement.

This tool can cut through both the grass and the earth beneath, hence helping in forming straight lines between the grass and the pathway. There are two types of lawn edgers: manual and motorized.

Weed eaters are also known as string trimmers or weed whackers. They are named so as they are used to get rid of the weed, and also for trimming grass. These tools are particularly useful for removing grass where edgers can’t reach them.

Now, let us see how WORX WG160 GT 2.0 compares with BLACK+DECKER in order to better understand which one to get.

  • Pricing

The products are in the same price range. And the WORX WG160 2.0 costs around $109.55, which is a bit more expensive than the BLACK+DECKER, and is sold for about $103. The greater price for the WORX, however, is justified by its 3-in-1 functions.

  • Battery Power

The WORX WG160 2.0 is motorized. This means that it contains blades that rotate to cut the lawn, and as it is battery-powered, it is quite easy to operate as it does not require much manpower. The 20V lithium battery it comes with, however, tends to run out of charge quite easily, and requires two full hours to charge completely.

Also, the BLACK+DECKER is motorized and provides adequate power, which can cut through lawn weeds and grass that is up to medium length. This product has a battery which can last for up to an hour with low to medium levels of power usage, and about 10-15 minutes at high power.

  • Functionality and Ease of Use

The WORX WG160 2.0 has 3-in-1 functionality. It can act as an edger, trimmer, and mini-mower! The amazing thing is, the height can also be adjusted within a few seconds, making it very user-friendly for people of different heights.

This product also contains wheels in two positions, making it very easy to edge, trim and mow with, and even easier on the back! Additionally, they also help in smooth trimming and mowing. The string, which is used for trimming, may also break off from time to time.

All-in-all, this is a great product that can be used for edging, trimming, and mowing all-in-one! The BLACK+DECKER 40V MAX String Trimmer/Edger is a 2-in-1 trimmer and edger. It provides adequate power that can cut through lawn weeds and grass that is up to medium length.

And it is a great unit for making cuts with precision, and hence can be excellent for usage around flowers, vegetable patches, and trees that are small. The lightness of the product makes it very convenient to use, and the availability of extra string spools for replacement adds to that factor as well, especially since they run out quite easily.

Moreover, this product is also quite convenient to convert from a trimmer to an edger just by turning the shaft. If you live in an urban or suburban area, then the BLACK+DECKER is a great choice.


[/et_pb_text][et_pb_text _builder_version=”4.0.9″ global_colors_info=”{}”]

Pros:-

Edger Weed Eater
3-in-1 edger/trimmer/mini-mower Lightweight, so easy to use
Easy to convert from one form to another Better battery life
Lightweight Easy to convert from edger to trimmer and vice versa
Can be comfortably used by people of different heights Easily available string spools for replacement
Easy to use Great for trimming around small areas


Cons:-

Edger Weed Eater
Battery life is not so great  String spools run out fast
Needs a long time to charge fully  Battery lasts only 10-15 minutes at high power
Trimming string may break off occasionally


[/et_pb_text][et_pb_text _builder_version=”4.0.9″ global_colors_info=”{}”]

Frequently Asked Questions

Here we have some of the most commonly asked queries regarding the debate between edger vs. weed eater:

  1. Is it better to stick with only trimmers or edgers, or multi-purpose products?

Multi-purpose tools are great if you are looking for a convenient way to take care of your lawn in general. If you need a tool for a specific purpose only, such as a trimmer, then single-purpose tools are enough.

  1. Should I take any precautions while using the products?

Yes, it is important to wear protective gloves while using the products, as they can get quite heated up due to the high power used.

  1. Can beginners use these products?

Yes, these are great for people of any skill level as they are easy to use.

  1. Can these be used for gardening?

Yes, these can be used for tending to the grass and any other unwanted growth in gardening.

  1. Are the batteries in these products replaceable?

Yes, they can be replaced if necessary.

  1. How often should I charge?

Charging should be done as required. Tending to a lawn requires different amounts of power for different purposes. For example, trimming and edging longer and thicker weeds will require more power, so it is advised to charge the battery fully before doing heavier tasks.


Final Words – Which One to Get?

Even though both the products are very useful, it is important to understand your particular needs in order to decide which one to get.

The WORX WG160 GT 2.0 is the one to choose if you are looking for a tool that can get edging, trimming, and mini-mowing done.

If you only require edging and trimming, then you can save a few bucks by getting the BLACK+DECKER.

Whichever one you decide to get, you will not be disappointed!

And don’t forget to tell us how much you liked our edger vs. weed eater comparison!

[/et_pb_text][/et_pb_column][/et_pb_row][/et_pb_section]